How to Measure and Set Up Under-Bed Storage
Measure the clearance, the floor area and the pull-out room under your bed, then choose containers that fit and load them so the things you use most are the easiest to reach.
At a glance
What you need
- Tape measure
- Notepad and pencil
- Vacuum or broom
- Low lidded boxes or zippered fabric storage bags
- Labels or tags
- A piece of cardboard for testing sizes
Under-bed containers are easy to buy and surprisingly easy to get wrong. A box that stands a fraction too tall will not slide under the rail, and one that is too long cannot be pulled out past the nightstand. Ten minutes with a tape measure prevents both.
This guide shows how to set up under-bed storage in the order that works: measure the space, decide what goes in it, choose containers to match, then load them so the things you need most are the easiest to reach.
What to measure and why
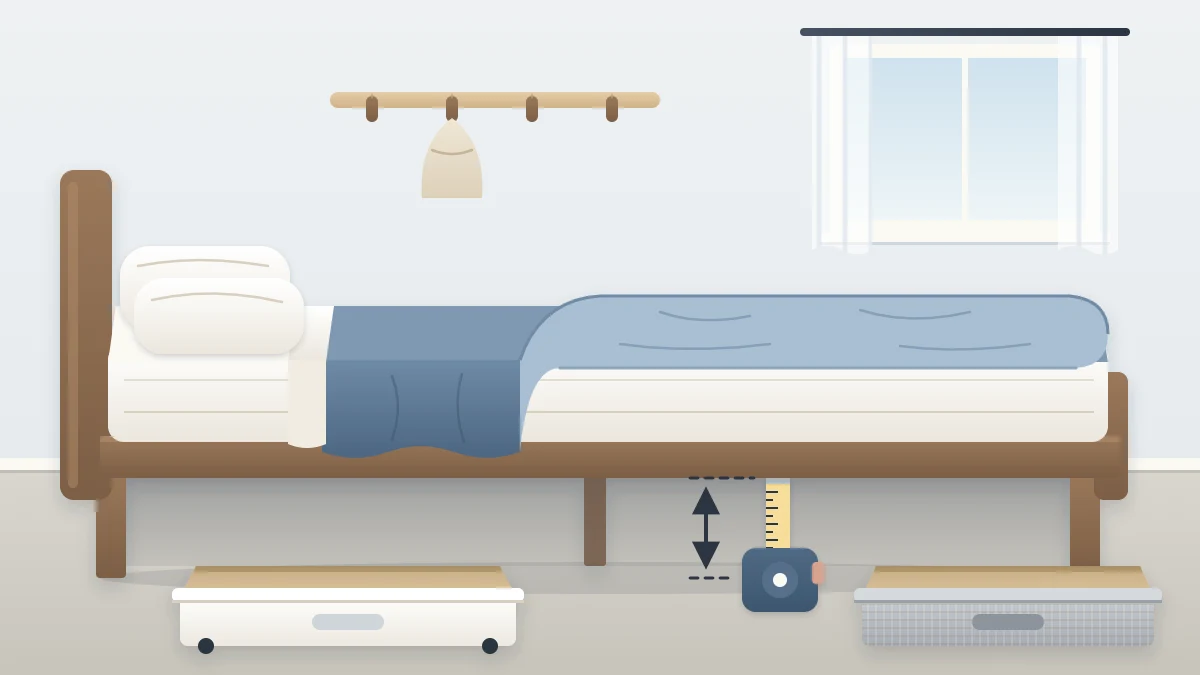
You need three kinds of measurement: how tall a container can be, how much floor there is for it, and how much room there is to pull it out. Write each number down as you go.
| Measure | How | Why it matters |
|---|---|---|
| Clearance | Floor to the lowest part of the frame, at several points | Sets the tallest container that will slide in |
| Usable length and width | Between the legs and any center support | Sets how many containers fit, and in what sizes |
| Pull-out room | From the edge of the bed to the nearest wall or furniture | Sets how long a container can be and still come out |
Step 1: Measure the clearance
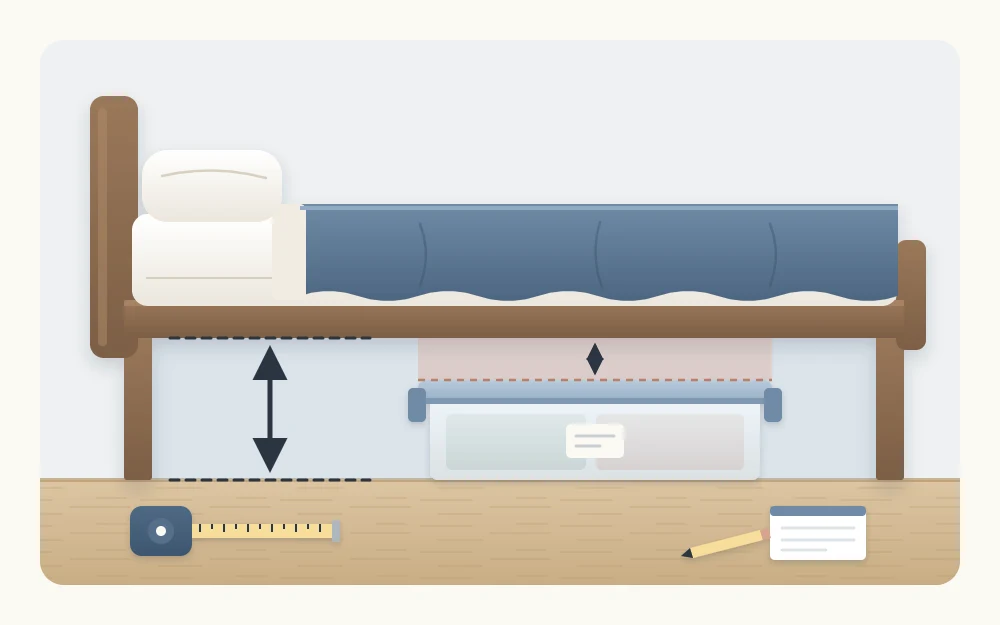
Lift the bedding out of the way and find the lowest part of the frame. On most beds that is the side rail, not the slats, which sit higher. Stand the tape measure on the floor and read the height to the underside of the rail.
- Measure near the head of the bed, at the middle and near the foot, on each side you plan to use.
- Check for anything that hangs lower than the rail, such as a bracket, a bolt or a center beam.
- Keep the smallest number.
- Subtract a little, so a lid and its handles clear the rail without scraping.
As an example only, many frames leave somewhere around 6 to 12 in (15 to 30 cm). Beds vary a great deal, so rely on your own tape measure.
If the clearance is very low, bed risers are one option. Use them only within the limits the product states, and check that they fit the shape of your bed’s legs.
Step 2: Measure the floor area and the pull-out room
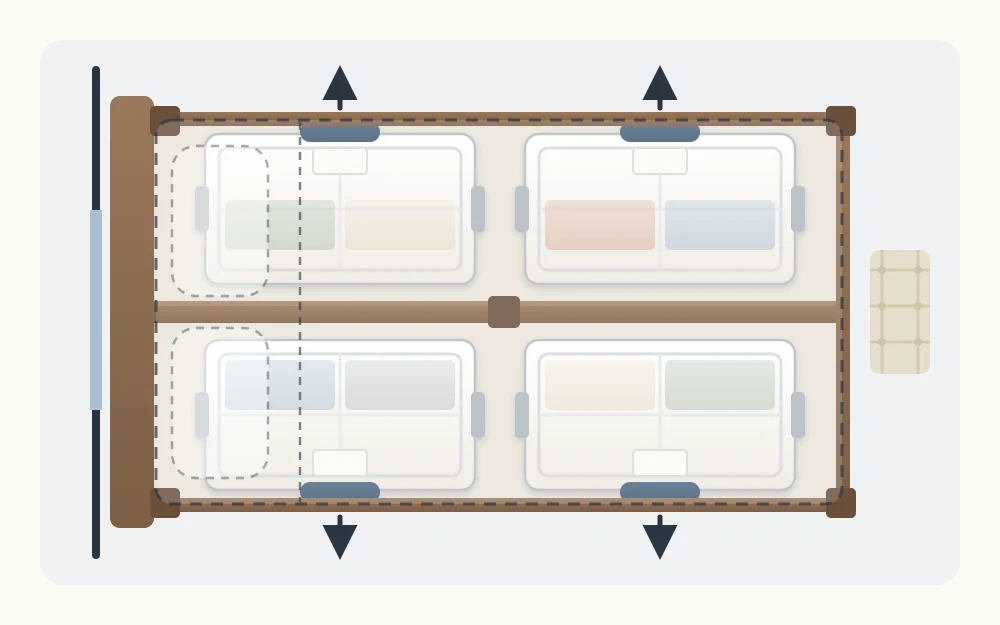
Next, find out how the space is divided. Legs in the middle of the frame or a center support rail split the area into separate bays, and each bay has to be measured on its own.
- Width of each opening: the clear distance between two legs along the side or the foot of the bed. A container has to pass through this gap.
- Depth of each bay: from the edge of the bed to the center support, or to the far side if there is none.
- Pull-out room: from the edge of the bed to the wall, the nightstand or the dresser. A container longer than this cannot come all the way out.
A quick sketch of the bed from above, with the numbers written on it, makes shopping much easier. Mark any floor vent on the sketch too, and plan to leave it uncovered. If one side of the bed is near a radiator or a baseboard heater, keep containers away from that side.
Step 3: Decide what will be stored
Choose the contents before the containers. Gather what you plan to keep under the bed, sort it into categories and note roughly how much room each one takes. Rarely used, fairly flat things suit the space best, and the guide on what to store under the bed lists good and poor candidates. Textiles should go in clean and completely dry.
Step 4: Choose containers that match your numbers
With measurements and categories in hand, compare them with the outside dimensions of any container, including its lid, wheels and handles. The types are compared in the guide to under-bed storage ideas. For fit and daily use, these points matter most:
- Several small over one large. A smaller container is lighter to pull, needs less clear floor and lets you reach one category without moving the others.
- Base to suit the floor. Wheels help on hard floors. On carpet, a smooth base that slides is often easier.
- Handle on the short end. The handle should face out, so you can pull the container straight toward you.
- A lid or a zip. A closed top keeps dust off the contents.
- Wheel height counts. Wheels add to the overall height, so check the total against your clearance.
Tip
Before you buy, cut a piece of cardboard to the length and width of a container you are considering and slide it under the bed. You will see at once whether it passes the legs and how far it can be pulled out.
Step 5: Clean the floor and load by access
Pull out everything that is under the bed now, then vacuum or sweep the whole area and let it dry if you mopped. This is the easiest the floor will ever be to reach.
Then place the containers according to how often you open them:
- Put the category you need most often at the side you can reach most easily, usually the side with the most clear floor.
- Put the things you need once or twice a year at the far side, the foot or the middle.
- Keep each container to one category, and fill it so the lid closes flat.
- Slide each one in with its handle facing out, leaving a small gap between neighbors so they do not catch.
Step 6: Mark the containers and keep a contents list
Closed containers hide what is in them, so mark each one the same way: a label, a tag or a number on the end that faces out.
Keep a short contents list as well, in a note on your phone or on paper in a drawer. Write the container, what is in it and which side of the bed it lives on, and update the list whenever something changes.
Check the setup after a week
Live with the arrangement for a week, then pull each container out once. One that catches on the rail needs a different spot, and one you open often belongs at a more reachable side. After that, the space only needs a regular pull-out and vacuum. The guide on keeping under-bed storage clean sets out a simple routine.
Frequently asked questions
Where exactly do I measure the height under a bed?
Measure from the floor to the lowest part of the frame, which on most beds is the side rail and not the slats. Take the reading at several points along each side you plan to use, keep the smallest number, and subtract a little so lids and handles clear the rail.
Is one large under-bed container better than several small ones?
Several smaller containers are usually easier to live with. Each one is lighter to pull, needs less clear floor beside the bed, and lets you reach one category without dragging out everything else. They also fit around legs and a center support, which often block a single long container.
Do under-bed containers need wheels?
It depends on your floor. Wheels help on hard floors, while on carpet a smooth base that slides is often easier to move. Wheels also add to the overall height of a container, so compare the total height, lid included, with the clearance you measured before you buy.